Document Management
Tools to help you manage your Localize for Documents Project
Use the following tools to help manage all of the source and target language documents in your Localize For Documents project. To get an overview of how to use Localize For Documents, see our Quickstart guide.
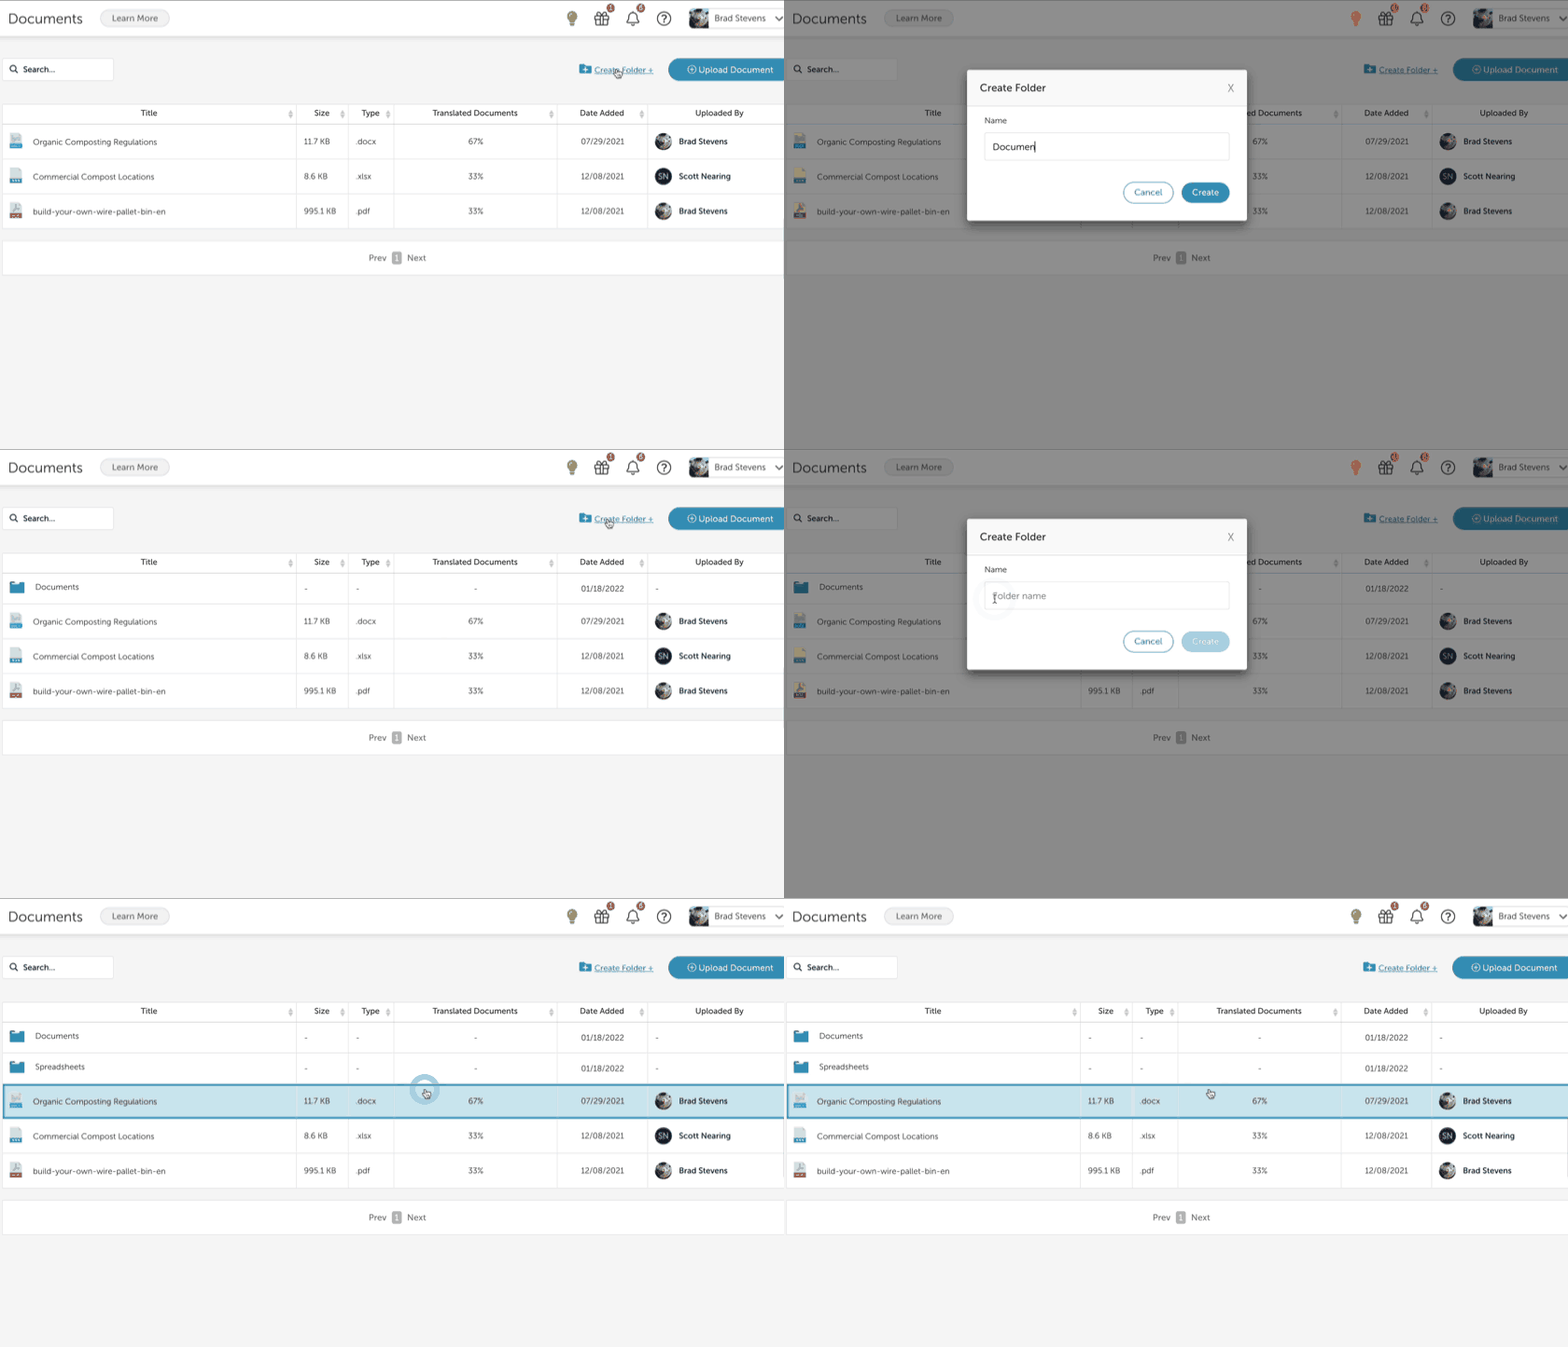
Create a Folder
You can use folders to organize the documents in your project. You can also have subfolders within folders if you need them.
- Click Create Folder.
- Enter a name and click Create.

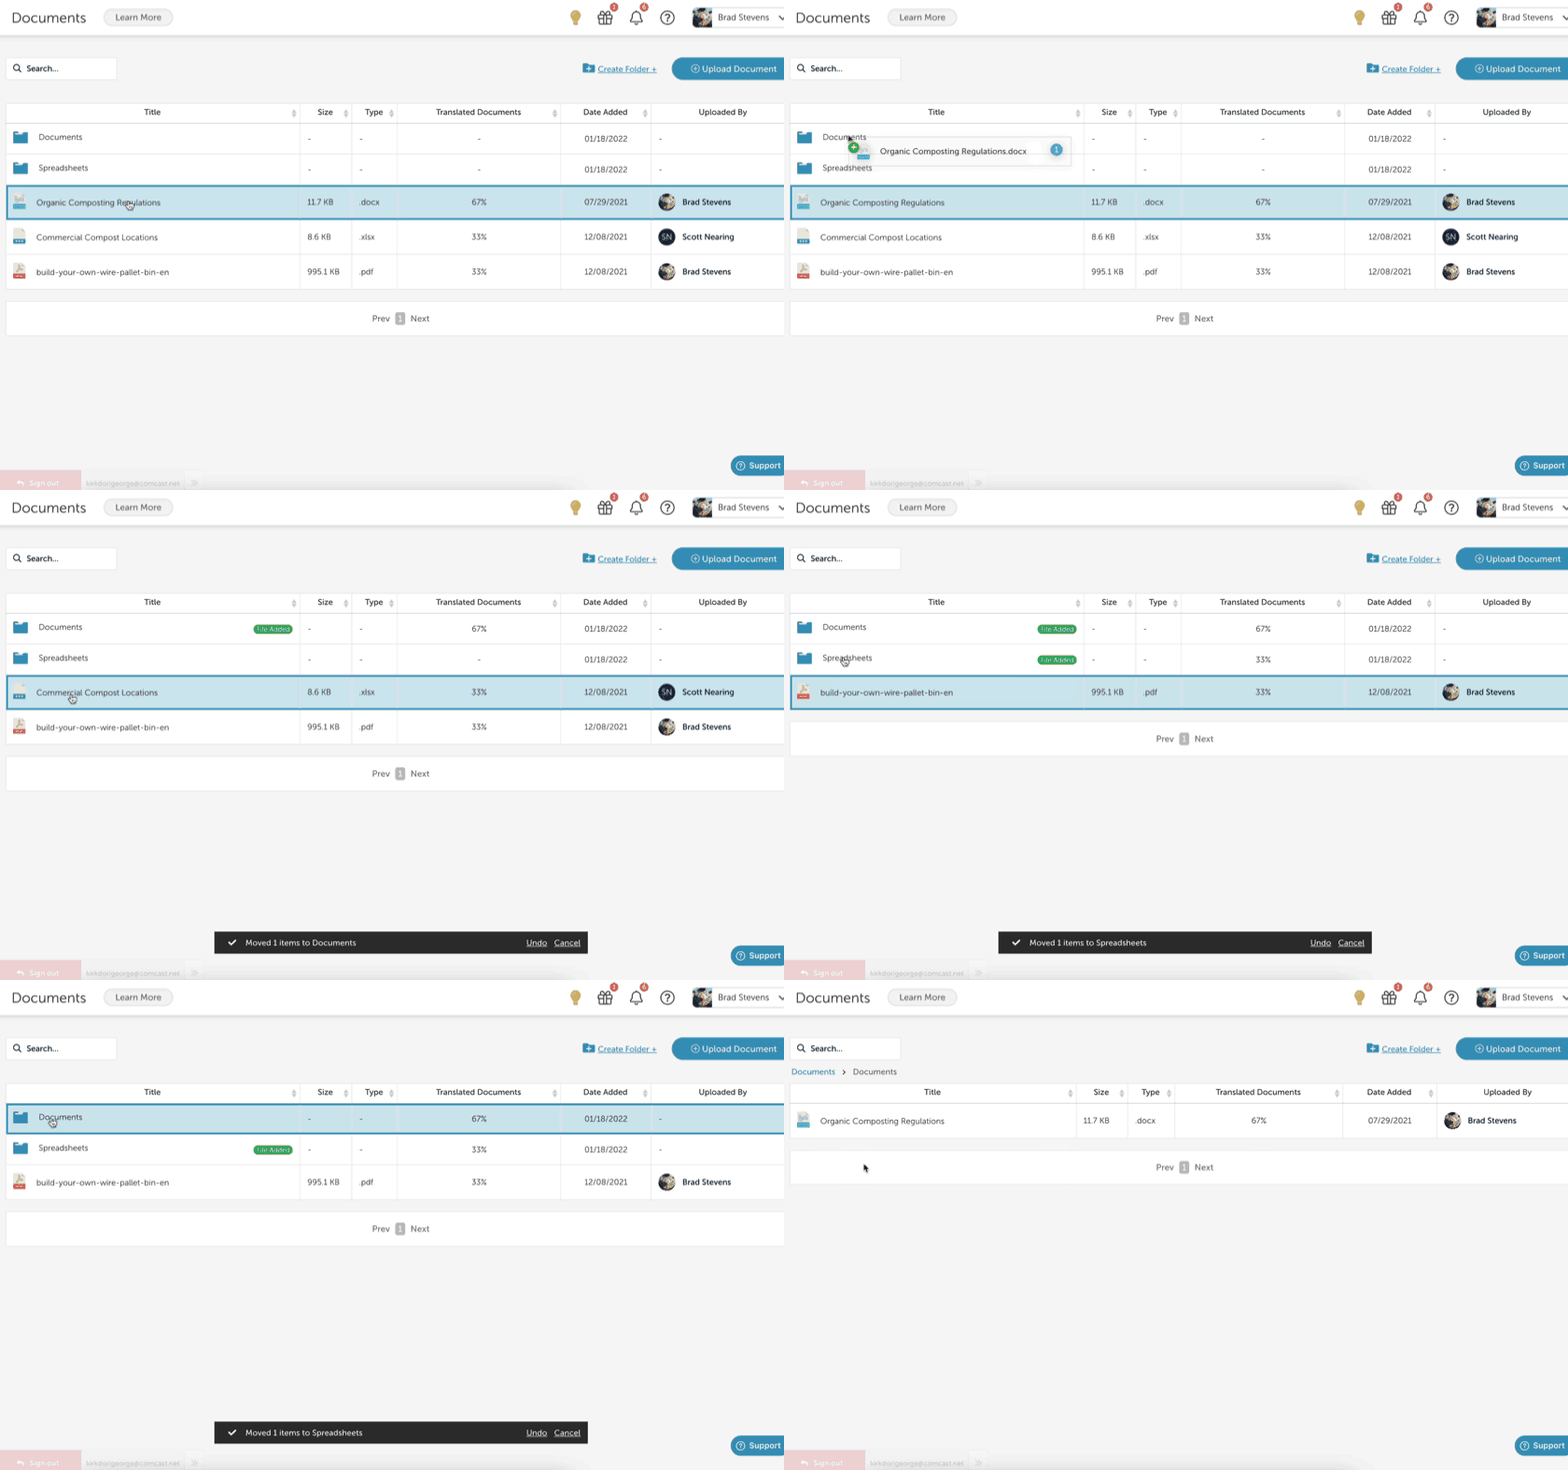
Move a Folder or a File
Option 1: Drag-n-Drop
- To move a folder or file, simply click on it and drag it into a folder.

Option 2: Right-Click
- Right-click or control-click on a folder or file in the list.
- Select Move to.
- Select the desired location and click Move.
Rename a Folder or File
- Right-click or control-click on a folder or file in the list.
- Select Rename.
- Make the desired change and click out of the text entry field to save the changes.
Copy a File
Create a copy of an existing source document.
- Right-click or control-click on a file in the list.
- Select Copy
- A copy of the source document will be created in the same folder, prepended with "copy-of-".
- Note that copies of any translations of the document will NOT be created.
Download a File
- Right-click or control-click on a file in the list.
- Select Download.
- Select a location to store the file (if asked) or look in your downloads folder.
Delete a Folder or File
Delete a source document and all translated versions.
- Right-click or control-click on a folder or a file in the list.
- Select Delete.
- Click Confirm to confirm the deletion.
Loss of Data!!!
Both the source document and all translated documents will be permanently deleted.
If deleting a folder, ALL folder contents will be permanently deleted.
Updated almost 2 years ago
