Quickstart for Subtitles
Easily translate the subtitles in your audio and video files with Localize.
Getting started with Localize For Subtitles is simple and shouldn't take more than a few minutes. If you haven't already, first follow the instructions for Signing Up and create your first Subtitles project.
Watch this short video to learn how to get started.
Step 1: Create a Subtitles Project
To get started with Localize For Subtitles:
- Create a new project and select the Subtitles project type.
- On the Getting Started page you can view a quick video or access the help docs.
- Click Start Translating when you are ready.
a. You can also select the Manage Subtitles link in the left navbar to see your list of subtitles.

Step 2: Add the Source Content
- On the Subtitles Library page, click the Translate Subtitles button.
- Enter the Subtitle Name.

- Upload an SRT or WebVTT file by clicking and dragging a file into the box or browsing for a file to upload or upload from your Google Drive.
- Click Translate Your Subtitles
a. If AI translations are enabled, translations will be automatically generated for your subtitles.
Step 3: Translate your Subtitles
You can either upload a file of translations of your subtitles or manually add/edit translations directly in your dashboard.
- Click on the subtitle in the list.
a. This will display the details for the subtitle along with other options.
b. See the Subtitles Management help document for more details. - To upload a file with your translations, click on the upload icon.
- To create or edit your translations, click on the pencil icon.

- In the Subtitles editor, you can enter or modify the translation of each chunk of the subtitles file.
- Simply click in the box for the translation of that chunk and do your edits.
a. Your changes are automatically saved.
b. You can tab to the next chunk if desired. - Click the Download Subtitles link to download your translations.
- When done, click Back to dashboard to return to your Subtitles Library.
You can then start using the translated version of your Subtitles files in your application.
You may find our Methods to Handle Unsupported Content Types document helpful to incorporate the translated Subtitles files into your application.
Example Use Case: Add SRT Files to Videos
After you've created your source language SRT file and translated it using your Localize dashboard you'll be ready to use it in your video. To use them in a video on your website, follow the instructions in these guides. You'll also be able to have the SRT files switch based on the currently selected language.
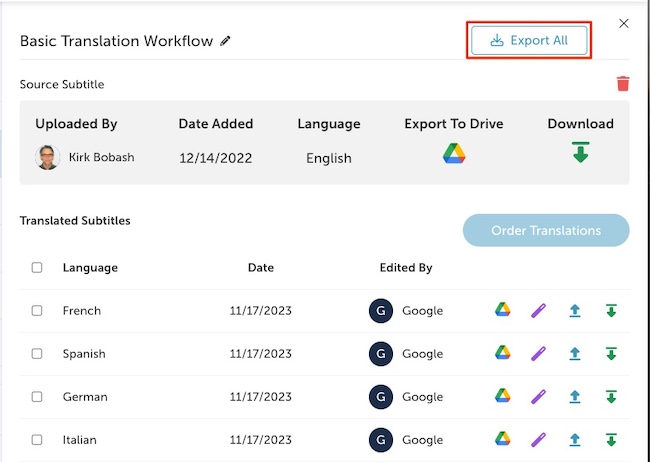
Export All Files for Subtitles
By clicking on the Export All button, the source language file along with all active translations of the subtitles will be exported as a Zip file. Save the Zip file and expand it to see all of the included files.
What's Next
Read in more detail how to manage your Subtitles.
Updated about 1 month ago