Translate Freshdesk
This Freshdesk knowledge base integration guide shows you how to translate Freshdesk knowledge bases in a few easy steps. Follow this tutorial to create a multilingual Freshdesk knowledge base translated to other languages for your international customers.
With a multilingual user base, translating help desk content reduces support load. Freshdesk doesn’t provide a built-in translation feature, but it’s easy to translate your help desk with Localize.
Here is a step-by-step guide for localizing your Freshdesk knowledge base.
If you do not have a project yet, signup here!
1. Admin
Login to your Freshdesk Dashboard and click the Admin cog in the left menu.
2. Helpdesk Settings
In the admin dashboard page, find the Account section and click the Helpdesk Settings option.

3. Edit Portal
On the Helpdesk page, scroll down to the Customer Portal section and click on the Edit Portal button. This will open the Portals page.

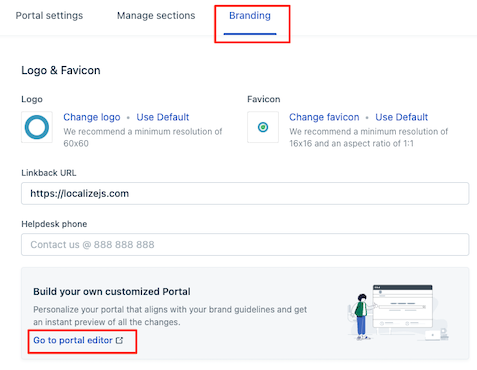
4. Customize Portal
Select the Branding tab then click on the Go to portal editor link.
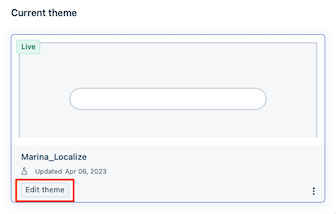
5. Edit Theme
In the Current theme panel click the Edit theme button.
6. Edit Head Section
On the Portal customization page, click on the Pages tab.
In the Layout section select Head.

6a. Insert Code Snippet
Insert the Localize Code Snippet inside the Head panel.
<script src="https://global.localizecdn.com/localize.js"></script>

<script>(function(a){if(!a.Localize){a.Localize={X:[]};var methods=["translate","untranslate","phrase","initialize","translatePage","setLanguage","getLanguage","getSourceLanguage","detectLanguage","getAvailableLanguages","setWidgetLanguages","hideLanguagesInWidget","untranslatePage","bootstrap","prefetch","on","off","hideWidget","showWidget"];for(var i=0;i<methods.length;i++){a.Localize[methods[i]]=(function(m){return function(){a.Localize.X.push([m,arguments]);};})(methods[i]);}}})(window);</script>

<script>
  Localize.initialize({
    key: '[[app:key]]',
    rememberLanguage: true,
    // other options go here, separated by commas
  });
</script>
* Ensure that your Project Key is displayed in between the single quotes next to "key: '????'".
6b. Add Initialization Options
Add any desired options to the Localize.initialize() call above, check here for the full list of possible options.
Some popular options include:
- autoApprove - use to automate your translation workflow fully
- retranslateOnNewPhrases - automatically display translations for known source content
- localizeImages - allows for localization of images in your site
7. Publish your Changes
When ready, click the Publish button to save your changes and make them live.
8. Reload your website.
- Visit your website (or application).
- Select one of your target languages using the language-switching widget.
- Refresh the page.
- Lather, rinse, and repeat, for each page on your site.
Localize will automatically begin detecting new content on the pages you visit and bring it into your dashboard.
9. Approve phrases
Then head on over to the Manage Phrases page to approve phrases in the Localize dashboard.

10. Phrases not showing up?
If you are not seeing phrases show up in your Pending bin in the Localize dashboard, follow the troubleshooting instructions here.
Need Help?
Contact support for custom integration help or troubleshooting!