Quickstart for Documents
Get started with Localize For Documents
With Localize For Documents you can tune the translation management process for all of your external documents right in your Localize dashboard.
Watch this short video to learn how to use Localize For Documents.
To get started with Localize For Documents create a new project and select the Documents project type.
Upload Your Source Documents
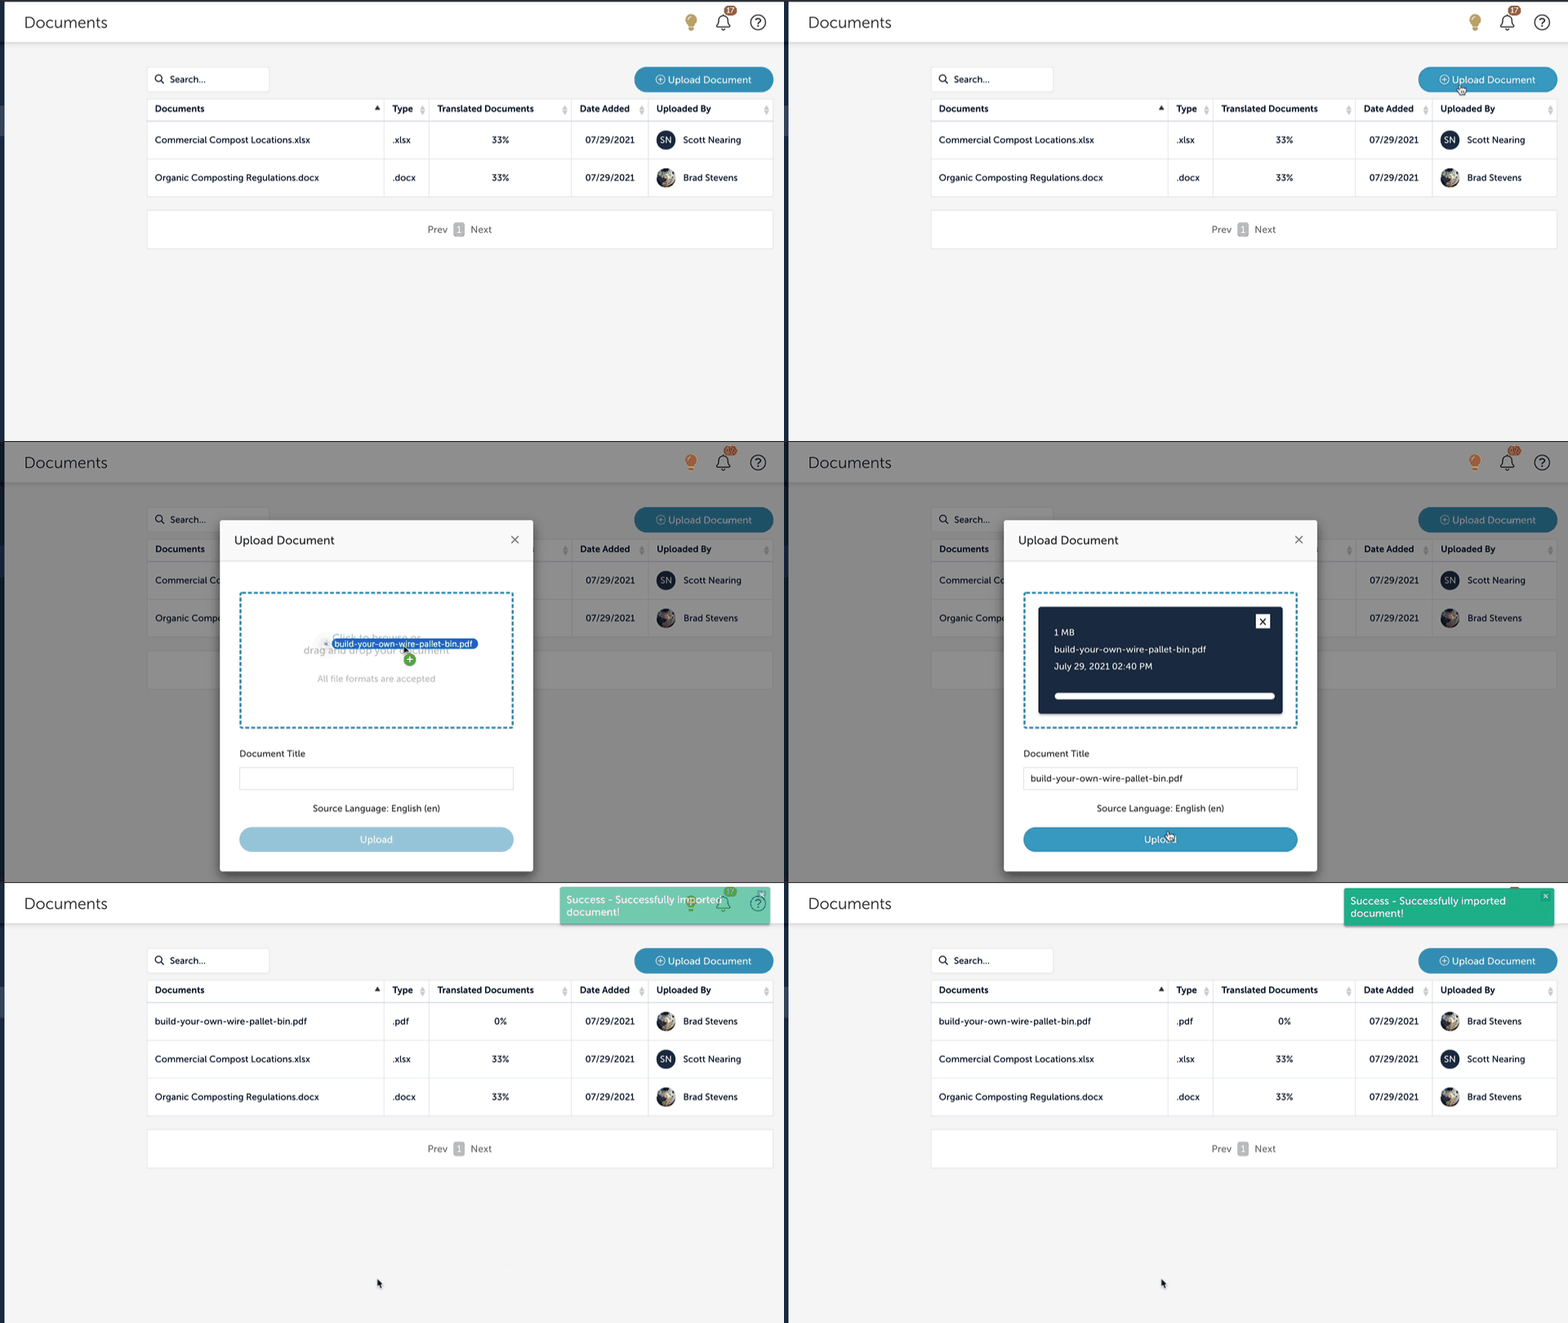
- The first step is to upload your source documents.
- Click Upload Document
- Select a file to upload
- Optionally modify the document title
- Click Upload
Get AI Translations for a Document
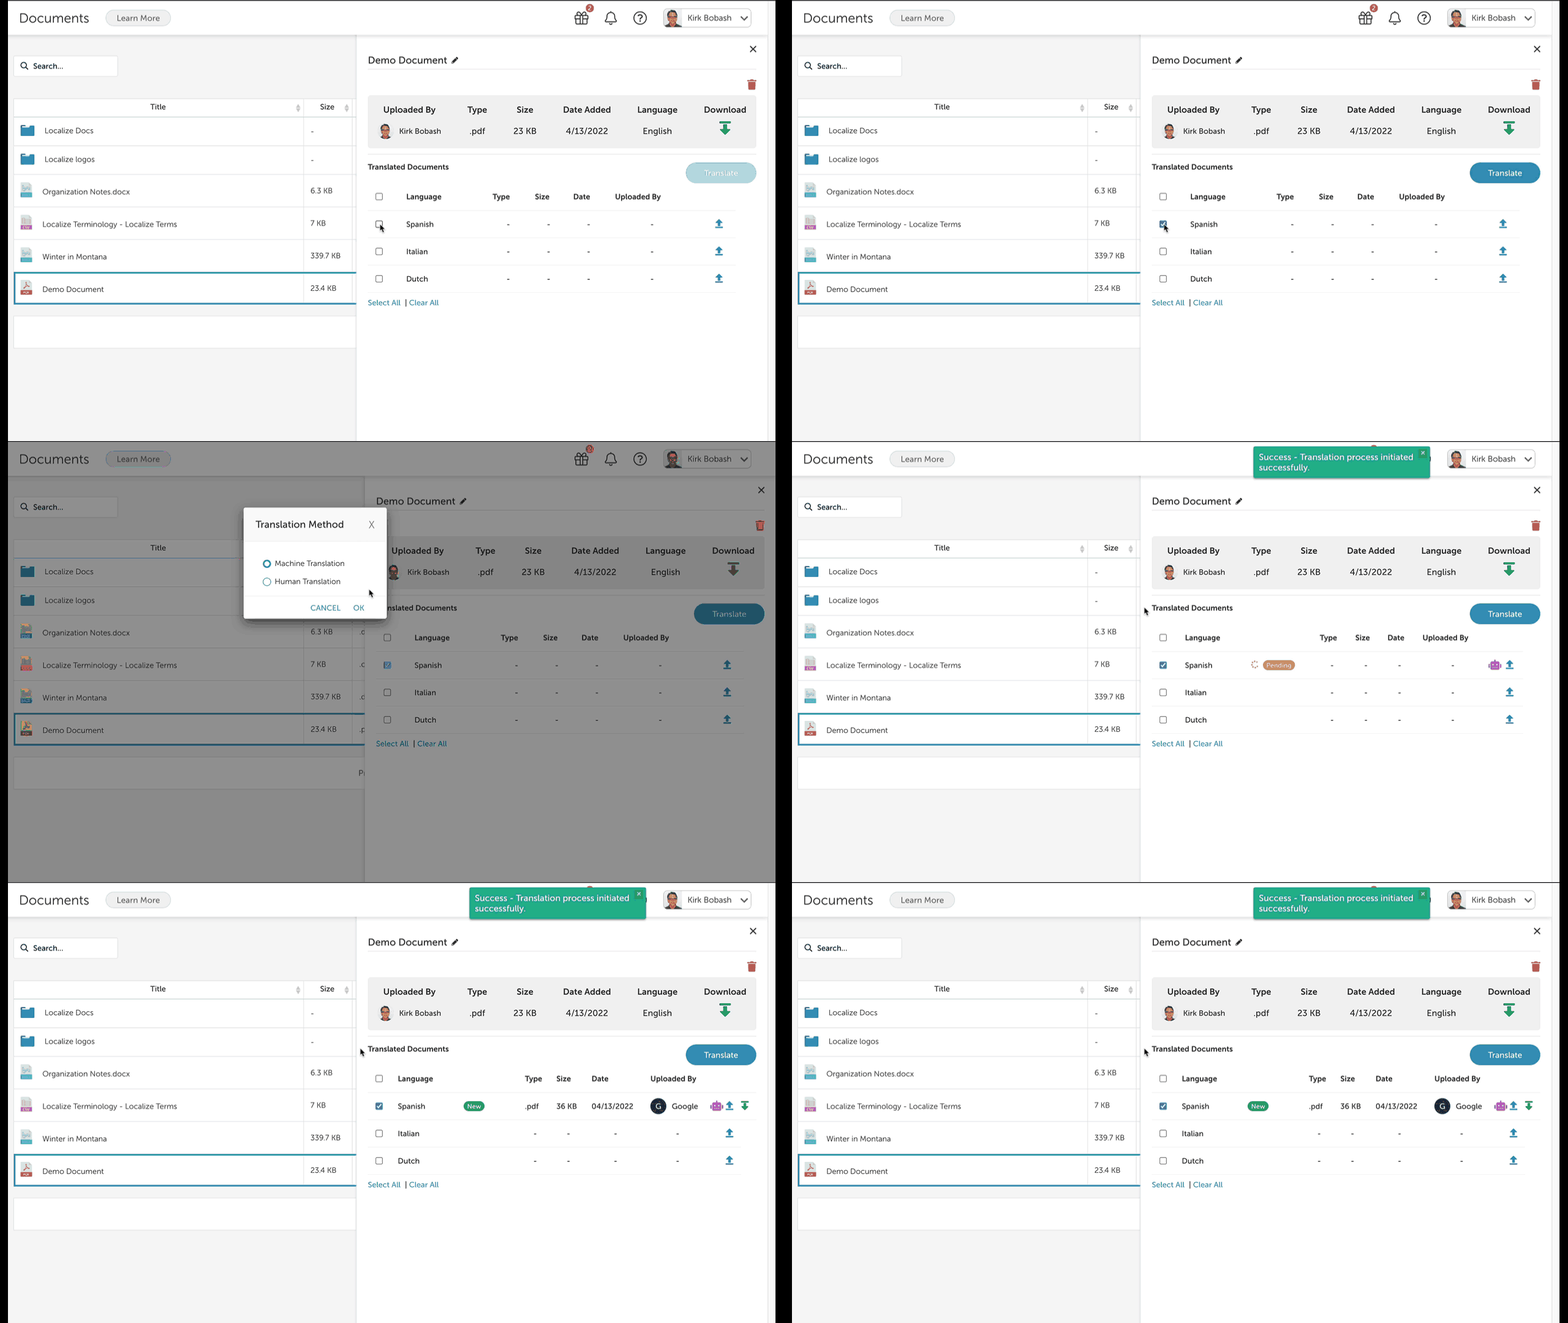
- You can get AI translations for your document if you are using the Google AI Translation Engine in your document project.
- Select the source document from the list.
- Select the checkbox(es) for the appropriate target language(s).
- Click the Translate button.
- You can then download the translated document by clicking the down arrow icon for a specific language.
Supported File Formats
- PDF - Adobe Portable Document Format
- DOCX - Microsoft Word
- PPTX - Microsoft Powerpoint
- XLSX - Microsoft Excel
- XLIFF - XML Localization Interchange File Format
AI Translations of Docs
Any AI translations of documents count towards your plan limit of AI translations for the current 30-day rolling period.
Size Limits for Docs
The following are the maximum size limits for generating AI translations.
- PDFs: 20 MB or 300 pages
- PPTX: 100 MB
- All other file types: 50 MB
Get Human Translations for a Document
- You can get human translations for your documents from one of our Language Service Providers (LSPs).
- Select the source document from the list.
- Select the checkbox(es) for the appropriate target language(s).
- Click the Translate button.
- Select Human Translation then click OK.
- The Place Document Order page will be displayed, showing your document and the currently selected language(s).
- Select your preferred Translation method.
a. The price will be displayed, based on the selected LSP and method. - When ready, click the Place Order button.
- The Your orders page will be displayed and you will see that the order is being submitted.
- When your order has been completed, you will be notified via email.
- The order will then be moved to the Completed translation orders section, and the translated file will be available on the Documents page.
Supported File Formats
- PDF - Adobe Portable Document Format
- DOCX - Microsoft Word
- PPTX - Microsoft Powerpoint
- XLSX - Microsoft Excel
- XLIFF - XML Localization Interchange File Format
- Note: Our LSP TextMaster can provide human translations for XLIFF documents, but Gengo cannot.
Download and Translate a Document
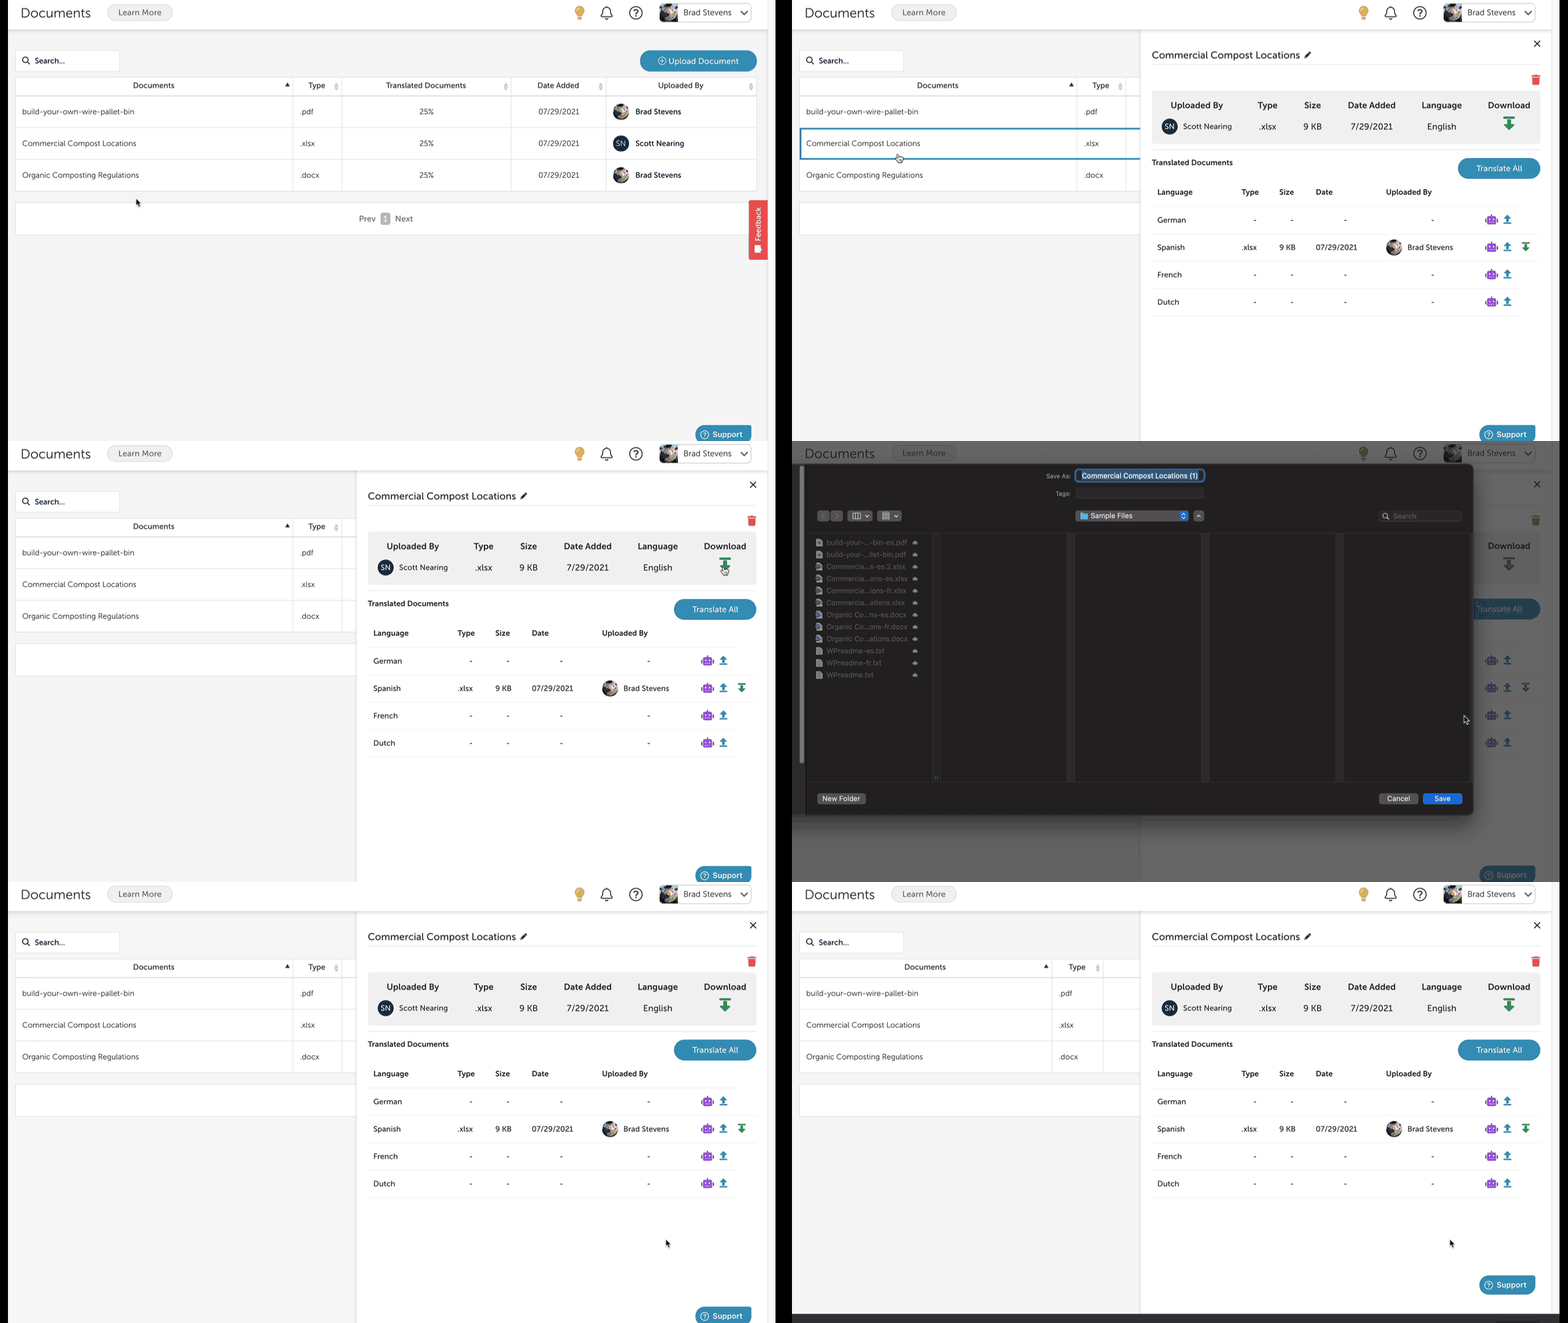
- Your translator can download the source document and translate it outside of the Localize platform.
- Select the source document from the list
- Click the download icon for the source document
- Save the document to your local computer
- Translate the document
Upload the Translated Version of a Document
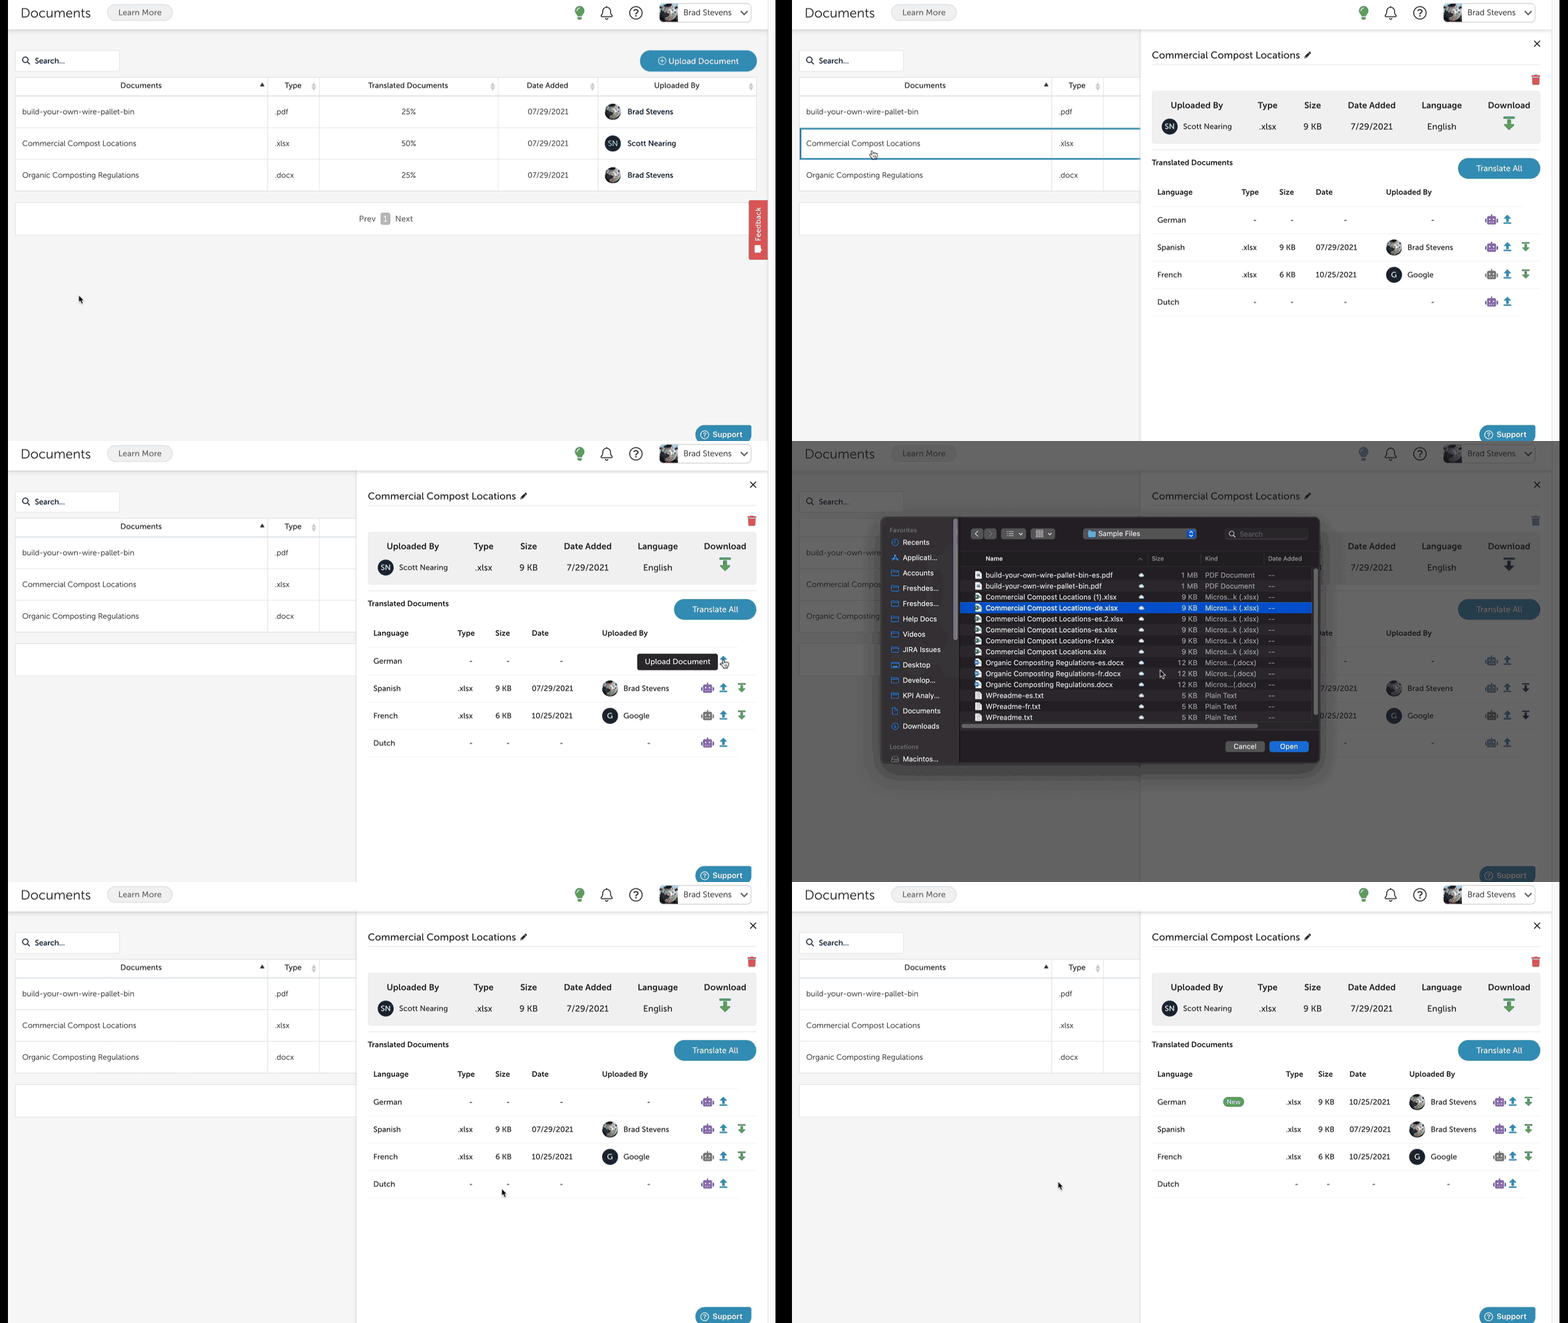
- If desired, your translator can upload the translated version of a document.
- Select the source document from the list
- Click the upload icon for the appropriate target language
- Select the file to upload
Export All Files for a Document
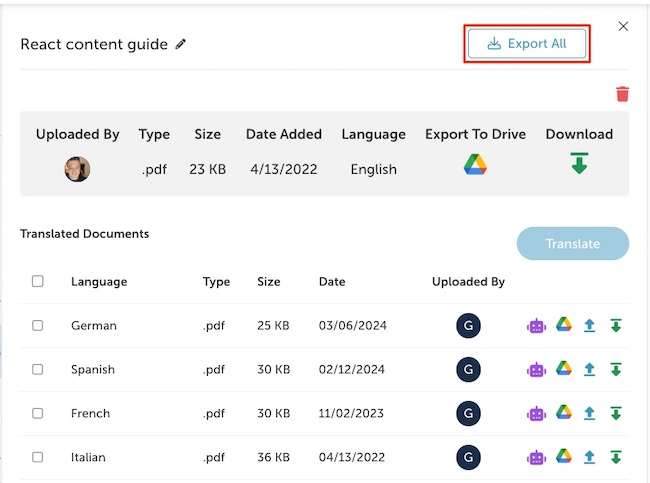
By clicking on the Export All button, the source language file along with all active translations of the document will be exported as a Zip file. Save the Zip file and expand it to see all of the included files.
What's Next?
Read in more detail how to manage your documents.
Updated about 2 months ago
