Translate w/ Google Tag Manager
This Google Tag Manager integration guide shows you how to translate your website in a few easy steps. Follow this tutorial to create a multilingual website using Google Tag Manager translated to other languages for your international customers.
If you are already using Google Tag Manager (GTM) for your website and can't integrate the Localize code snippet directly into your website, then you can integrate Localize into your website by using our custom Tag.
Using GTM is Not the Preferred Method
Using GTM is not the preferred method to install Localize in your website. If you are able to add the Localize code snippet directly to your website, that is the preferred method.
In the past we've had instances where using the Localize Tag in GTM has caused problems for customers that was fixed after they directly installed the code snippet.
Below is a step by step guide for integrating Localize into your website using GTM.
If you do not have a Localize Project yet, signup here!
If you are not using GTM, check out what it can do for you here.
GTM is Already Installed
These instructions assume that you've already installed the 2 required code snippets for GTM into your website, following the instructions here: https://support.google.com/tagmanager/answer/6103696?hl=en
1. Add Localize Tag in GTM
- Login to GTM
- Navigate to the desired Workspace, or create a new one
- Select New Tag
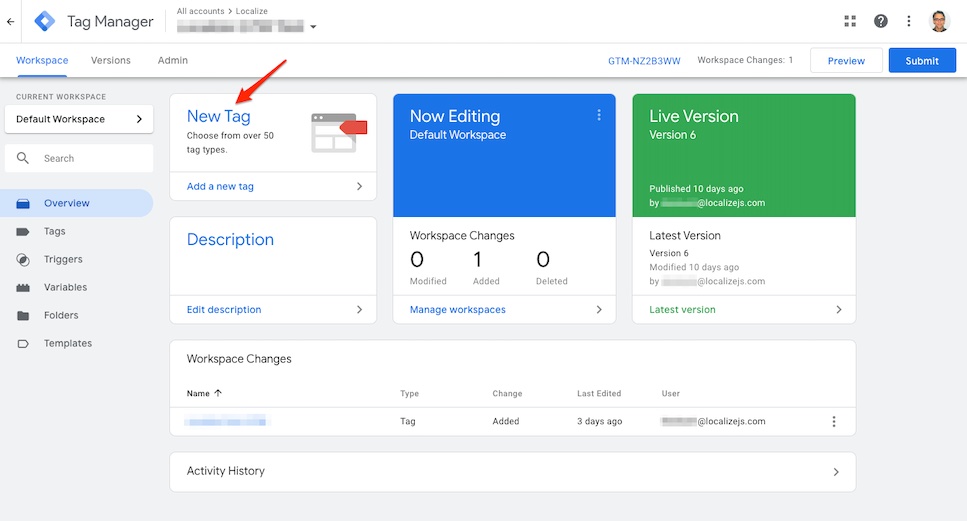
- Select Tag Configuration

- Select Discover more tag types...
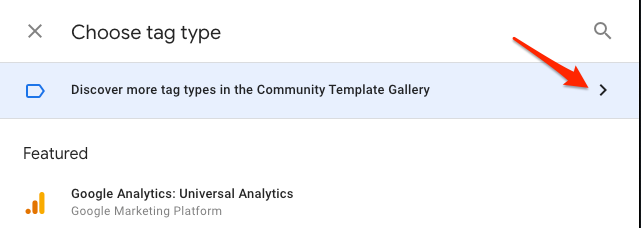
- Search for Localize TMS Integration then select it.

- Select Add to workspace
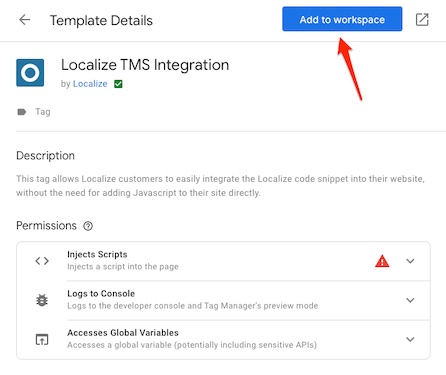
- Confirm by clicking Add
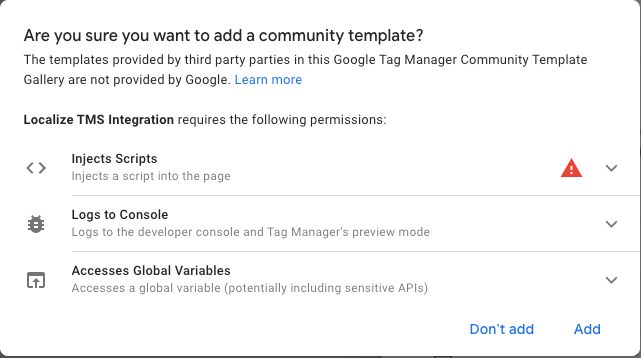
- Enter your Localize Project Key
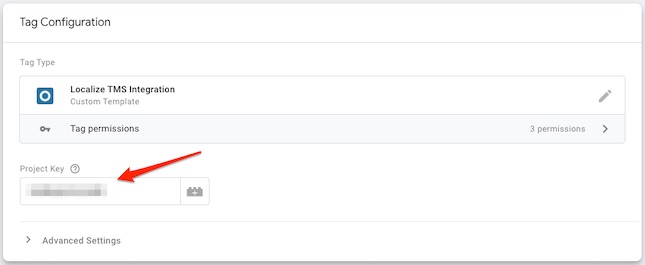
- Don't forget to name your tag by replacing "Untitled Tag"
- Select a trigger
a. Here's where you can select on which pages you would like to use Localize.

- Save your new tag
2. Reload your website
- Visit your website (or application).
- Select one of your target languages using the language-switching widget.
- Refresh the page.
- Lather, rinse, and repeat, for each page on your site.
Localize will automatically begin detecting new content on the pages you visit and bring it into your dashboard.
3. Approve phrases
Then head on over to the Manage Phrases page to approve phrases in the Localize dashboard.

Phrases not showing up?
If you are not seeing phrases show up in your Pending bin in the Localize dashboard, follow the troubleshooting instructions here.
Need Help?
Contact support for custom integration help or troubleshooting!
Updated 22 days ago
