Translate Shopify: Easy
This Shopify store integration guide shows you how to translate Shopify stores in a few easy steps. Follow this tutorial to create a multilingual Shopify store translated to other languages for your international customers.

Below is a step-by-step guide for creating a multilingual Shopify store with Localize.
If you do not have a Localize Project yet, signup here!
Install / Setup
1. Edit your store
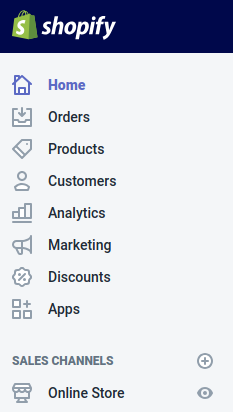
Click "Online Store" in your Shopify dashboard.
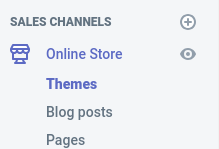
2. Click on "Themes"
3. Click on "Customize" in Themes

4. Edit your theme
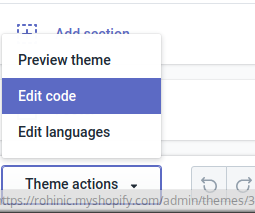
- Find “Theme actions” at the bottom left corner and click it.
- Using the pull up menu, click on "Edit code".
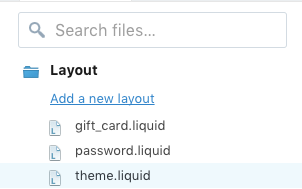
5. Edit theme.liquid
Choose the theme.liquid template file from the Layout folder.
6a. Install the Localize Code Snippet
Copy the following code snippet...
(for detailed instructions, click here )
<script src="https://global.localizecdn.com/localize.js"></script>
<script>!function(a){if(!a.Localize){a.Localize={};for(var e=["translate","untranslate","phrase","initialize","translatePage","setLanguage","getLanguage","detectLanguage","getAvailableLanguages","untranslatePage","bootstrap","prefetch","on","off","hideWidget","showWidget","getSourceLanguage"],t=0;t<e.length;t++)a.Localize[e[t]]=function(){}}}(window);</script>

<script>
  Localize.initialize({
    key: '[[app:key]]',
    rememberLanguage: true,
    // other options go here, separated by commas
  });

  // This will update the URL in the action link of the form to include the language subdirectory in the query string (e.g. locale=es)
  var updateFormLocale = function() {
    if (window.location.href.match(/cart/)) { // Check if on the cart page
      var language =  Localize.getLanguage();
      var forms = document.getElementsByTagName('form');
      for (var i = 0; i < forms.length; i++) {
        if (forms[i].action.match(/cart/) && language) { // Update the form URL to include the language
          forms[i].action = '/cart?locale=' + language;
        }
      }
    }
  };

  if (window.addEventListener) {
    window.addEventListener('load', updateFormLocale, false);
  } else if (window.attachEvent) {
    element.attachEvent('onload', updateFormLocale);
  }

  Localize.on('setLanguage', updateFormLocale);
</script>
...and paste it at the end of the <head> tag, before the closing </head> tag.
Then click Save.
6b. Add Initialization Options
Add any desired options to the Localize.initialize() call above, check here for the full list of possible options.
Some popular options include:
- autoApprove - use to fully automate your translation workflow
- localizeImages - allows for localization of images in your site
7. Save your changes
Make sure to save the code you've added by clicking Save at the top right of the page.
8. Reload your Shopify website
- Visit your website in a browser. You should see the default language-switching widget on your site.
- Select one of your target languages using the widget.
- Refresh the page.
- Lather, rinse, repeat, for each page on your site.
Localize will automatically begin to detect new content on the pages that you visit and will bring it into your dashboard.
9) Approve phrases
Then head on over to the Manage Phrases page to approve phrases in the Localize dashboard.

10) Phrases not showing up?
If you are not seeing phrases show up in your Pending bin in the Localize dashboard, follow the troubleshooting instructions here.
Checkout Pages
Shopify doesn't allow the Localize code snippet to run in the checkout pages part or your site. However, Shopify does provide translations for the checkout pages for over 30 languages, and allows you to add translations of your own for other languages.
Follow these instructions to support translations in your checkout pages.
Please note: Checkout pages translation support works only with the new "Responsive Checkout Cart". Also, support for different languages depends on your theme's supported languages.
Shopify Plus
If you are using Shopify Plus, then you do have the option of running the Localize code snippet in your checkout pages. However, there are some limitations when using this method - there are some form fields found in the checkout process that will not be found by Localize and thus cannot be translated.
Part 1: Determine supported languages
First you need to determine what languages are supported by your Shopify theme.
Customize your theme
Repeat Steps 1-3 (as described above in Install / Setup) and return to the Themes page.
4. Edit languages
Find “Theme actions” at the bottom left corner and click it. In the drop down menu, click on "Edit Languages"

5. Determine supported languages
- Click on "Change theme language"
- See if your target language is in the list or not.

Don't change your theme language!
In the next step we're just checking if your target language is supported here. Do NOT change the language of your theme, since you'll be translating your site using Localize.
- If your language is already supported, you're done! Otherwise, continue reading.
Part 2: Add Custom Languages (optional)
If your target language isn't supported by Shopify, you'll need to add translations only for the Checkout area. You will translate the rest of your site using Localize.
1. Select "other languages"
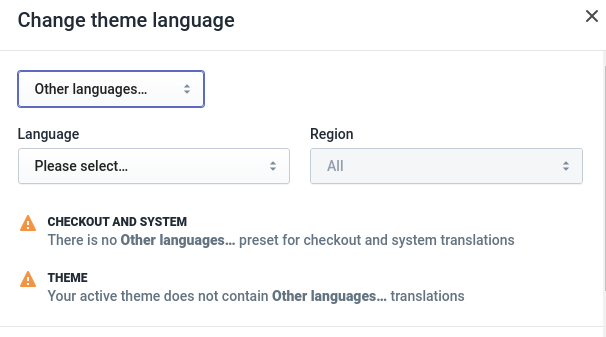
2. Select your language and click Save.
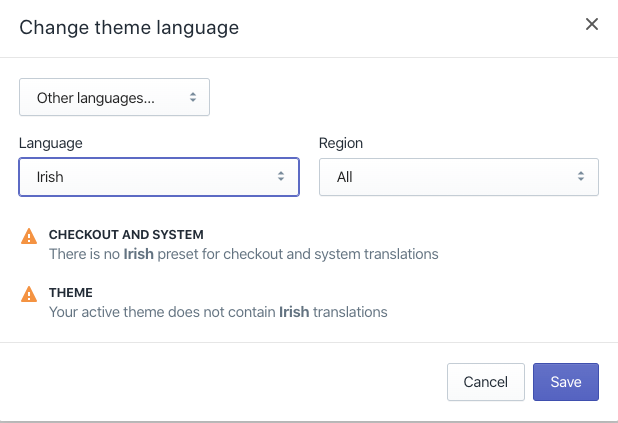
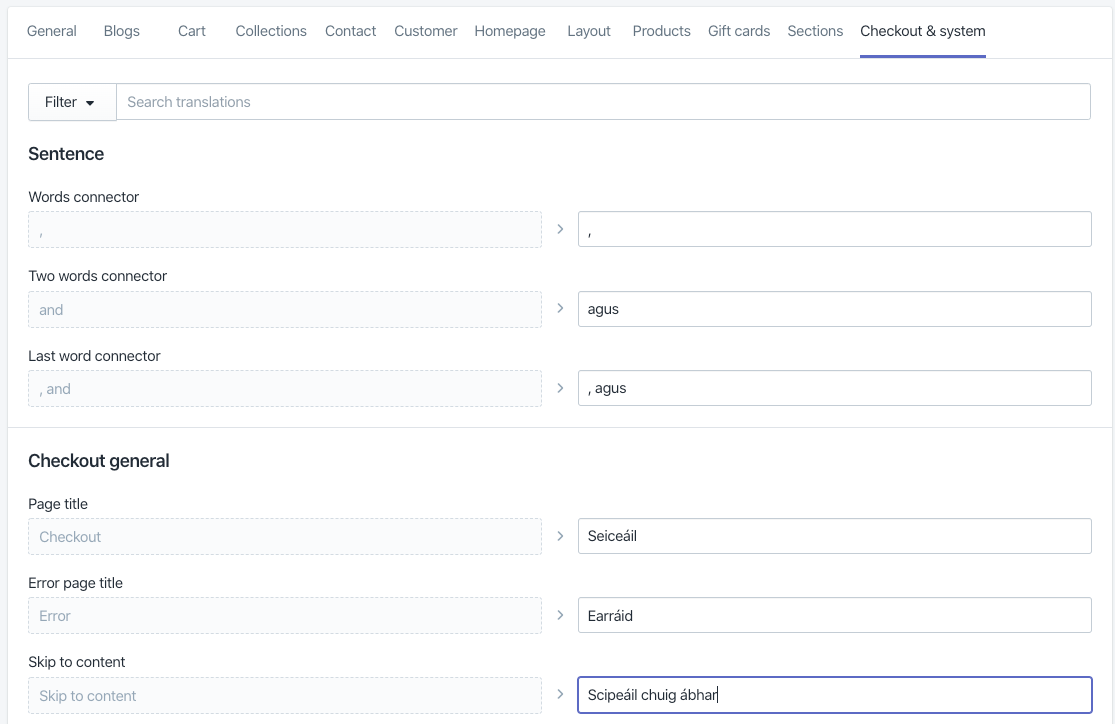
3. Click on Checkout & system.

4. And review translations provided or add your own. Don't forget to Save.
5. Change theme language back
Change theme language back
Now that you've added the translations required in the Checkout & system area, you need to change your theme language back to the original source language.
- Find “Theme actions” at the bottom left corner and click it. In the drop down menu, click on "Edit Languages"
- Click on "Change theme language"
- Select your source language
- Click Save
Shopify will remember the translations you entered in the steps above, and will display them when your users viewing content in the checkout process in your target language.
Need Help?
Contact support for custom integration help or troubleshooting!
Updated about 2 years ago
