Translate WordPress
This WordPress application integration guide shows you how to translate WordPress applications in a few easy steps. Follow this tutorial to create a multilingual WordPress application translated to other languages for your international customers.

Below is a step by step guide for integrating Localize into your WordPress application.
If you do not have a Localize Project yet, signup here!
1. Login to your WordPress admin site
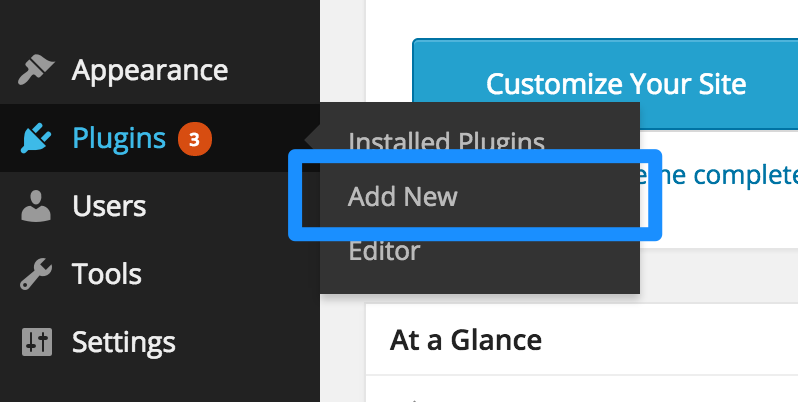
Then navigate to the Plugins area.
2. Select "Add New"

3. Search for "localizejs"
Or click this link: "Localize - Website Translation Integration" plugin

4. Click "Install Now"
After you find the Localize plugin, click Install Now. This will install the plugin into your site.

5. Click "Activate"

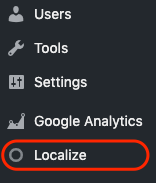
6. Select "Localize" to display the settings
Select the Localize plugin settings link from the left navbar.

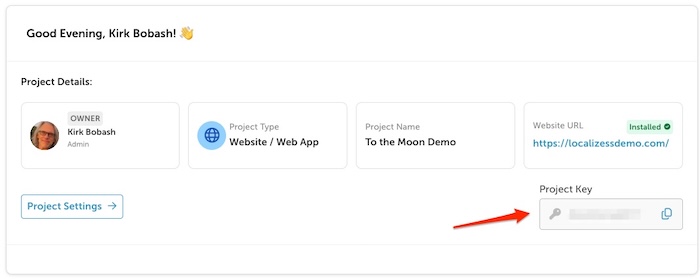
If you don't already have it, find your Project key from the Localize Dashboard.

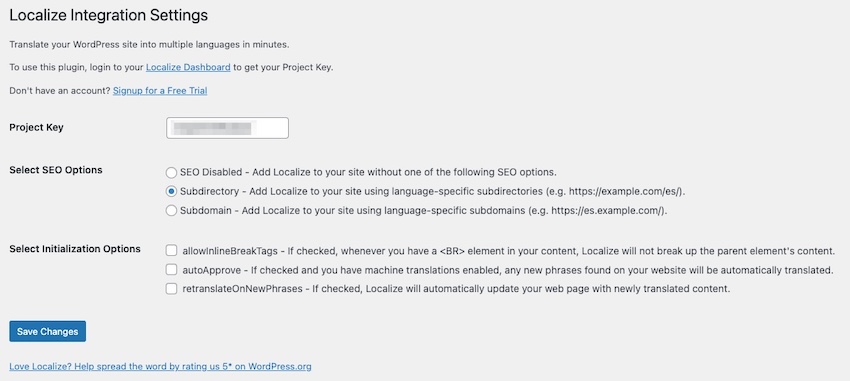
7. Add your Project Key
Add your Project Key and click "Save Changes".

SEO Options
Subdirectories
Using subdirectories to optimize your page rankings for a website that is translated into multiple languages is one of the recommended best practices for SEO (e.g. example.com/es, example.com/fr).
If you would like to set up your WordPress site to use a separate subdirectory for each target language in your site, select the Subdirectory option. Then click "Save Changes".
Subdomains
Using subdomains is another recommended best practice for SEO (e.g. es.example.com, fr.example.com).
If you would like to set up your WordPress site to use a separate subdomain for each target language in your site, select the Subdomain option. Then click "Save Changes". There is no need to create new pages in WordPress for the target language content.
Set up Subdomains in your DNS
To use the subdomains option, you'll need to create the subdomains in your DNS settings. Simply point the target language subdomains (e.g. es.example.com) to your main domain (e.g. example.com).
Initialization Options
You can toggle on/off the following options to be sent when Localize is initialized.
- allowInlineBreakTags - if checked, whenever you have a
<BR>element in your content, Localize will not break up the parent element's content. - autoApprove - if checked and you have AI translations enabled, any new phrases found on your website will be automatically translated.
- retranslateOnNewPhrases - if checked, Localize will automatically update your web page with newly translated content.
8. Reload your website
- Visit your website in a browser.
- Select one of your target languages using the language-switching widget.
- Refresh the page.
- Lather, rinse, repeat, for each page on your site.
Localize will automatically begin to detect new content on the pages that you visit, and will bring it into your dashboard.
9. Approve phrases
Then head on over to the Manage Phrases page to approve phrases in the Localize dashboard.

10. Phrases not showing up?
If you are not seeing phrases show up in your Pending bin in the Localize dashboard, follow the troubleshooting instructions here.
Need Help?
Contact support for custom integration help or troubleshooting!
Updated 4 months ago
