Organization Overview and Settings
See details and change settings for your Organization.
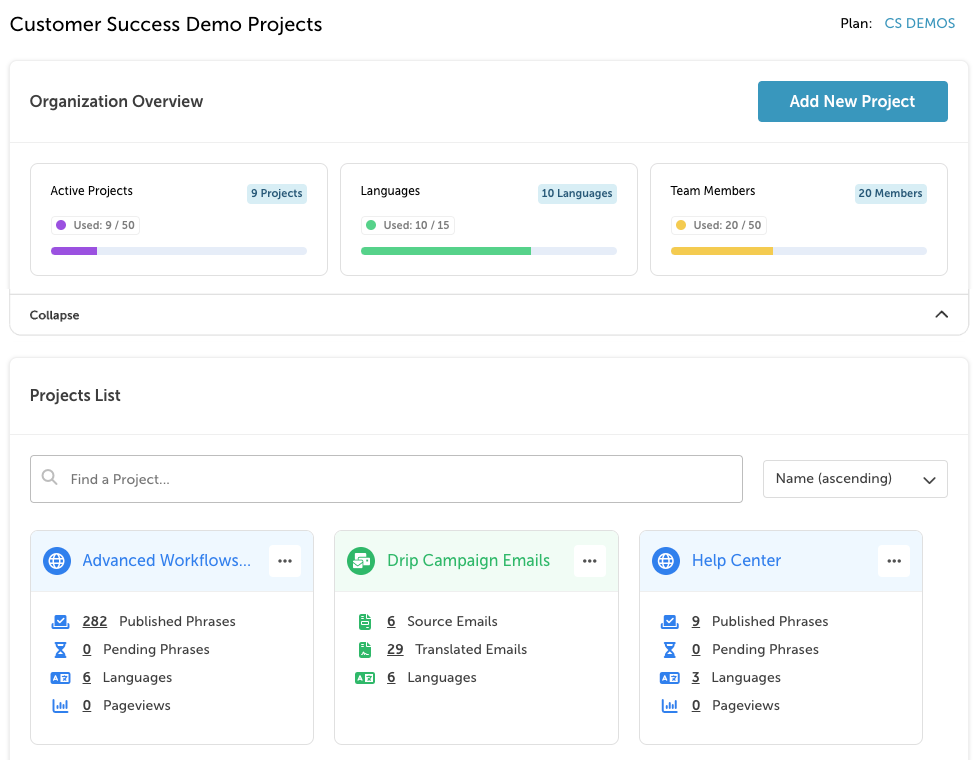
On the Organization Overview page in the Organization Overview panel you will see a summary bar at the top which shows you the following information:
- The current Subscription Plan you are on
- The number of Active Projects
- The maximum number of languages used in any one Project
- The number of Team Members in the Organization
This information is aggregated across all of your Projects so that you may monitor how close you are to your Plan limits.
In the Projects List panel:
- Clicking on any of the items listed in a particular project's card will bring you to the appropriate page in your dashboard.
- Click on the three dots next to a project's name to see more options.
Organization Details
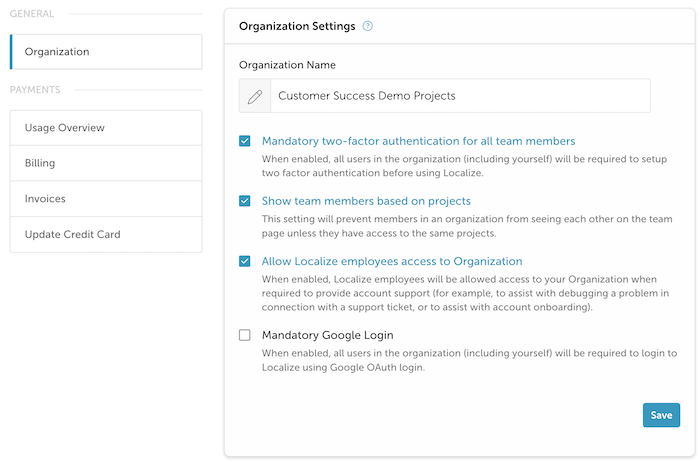
When on the Manage Organization page, click Settings to view the overall settings for that Organization.
Organization Settings
Organization Name
- Here you can name your Organization. Usually, this is the name of your company.
Mandatory two-factor authentication for all team members
- When this checkbox is selected, all users in the organization (including yourself) will be required to setup two-factor authentication before using Localize.
Show team members based on projects
- When this checkbox is selected, this setting will prevent Team Members in an Organization from seeing each other on the team page unless they have access to the same Projects.
Allow Localize employees access to Organization
- When enabled, Localize employees will be allowed access to your Organization when required to provide account support (for example, to assist with debugging a problem in connection with a support ticket, or to assist with account onboarding).
Mandatory Google Login
- When enabled, all users in the organization (including yourself) will be required to login to Localize using Google oAuth login.
Notifications
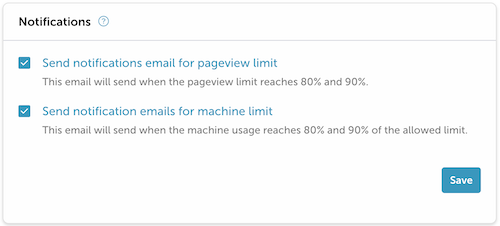
Organization-level notifications will be sent to all users who are in the Owner role along with users in the Member role who have billing rights.
Send notifications email for pageview limit
- When this checkbox is selected, relevant team members will receive email notifications when your total pageviews exceed 20%, 40%, 60%, 80% of your Plan's allowed limit in a rolling 30-day period.
Send notification emails for AI character limit
- When this checkbox is selected, relevant team members will receive email notifications when the number of your AI translation characters exceeds 20%, 40%, 60%, or 80% of your Plan's allowed limit in a rolling 30-day period.
SSO Settings

Enable SAML SSO
- When enabled, all users will be able to use an SSO login using the SAML protocol.
- See the docs here for detailed information on using SAML SSO.
Usage Overview
Product Usage
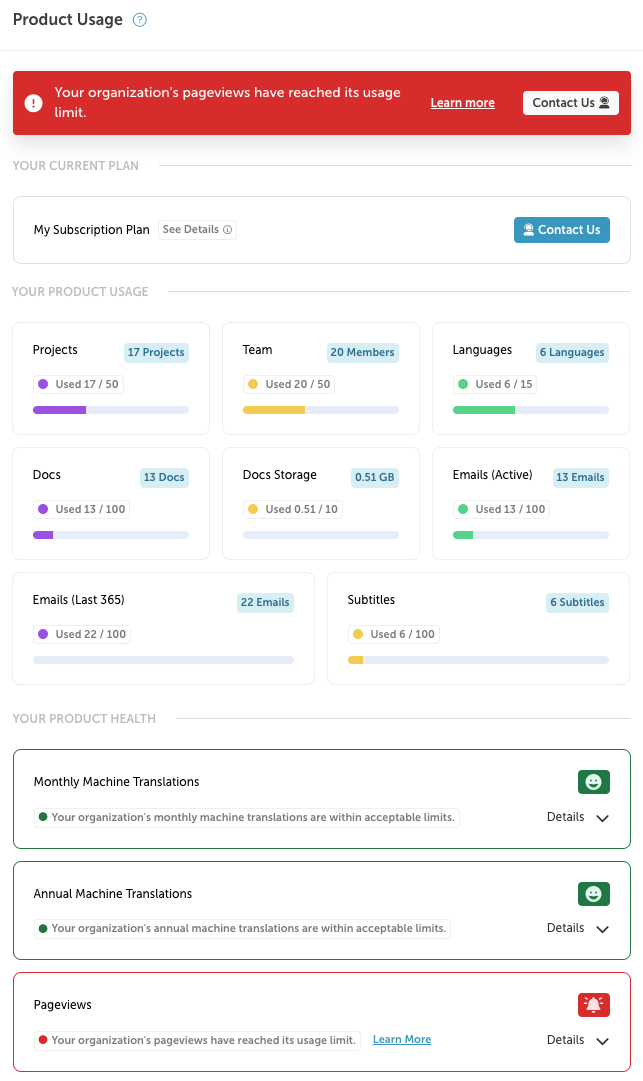
Here you can see details about your subscription plan, your product usage, and your product health.
If you are near any of your plan limits or you are over any plan limits you will see a banner at the top of the Product Usage panel which details the overage.
- Click Learn More to learn what the warning entails.
- Click Contact Us to get in touch with Localize so we can help you with the overage.
Your Current Plan
- Shows the name of your plan.
- Roll over See Details to display the details of your plan.
Your Product Usage
- This section provides a snapshot of your usage of the various features of your plan.
- This will allow you to keep tabs on your usage, allowing you to proactively upgrade your account when needed.
Your Product Health
- This section shows the health of your product at a glance.
- Green: below your limit
- Orange: approaching your limit
- Red: exceeded your limit
- Click the Details drop-down to see the actual usage for a specific health indicator.
Billing
When in the Organizations: Settings tab, click Billing to view your billing details.
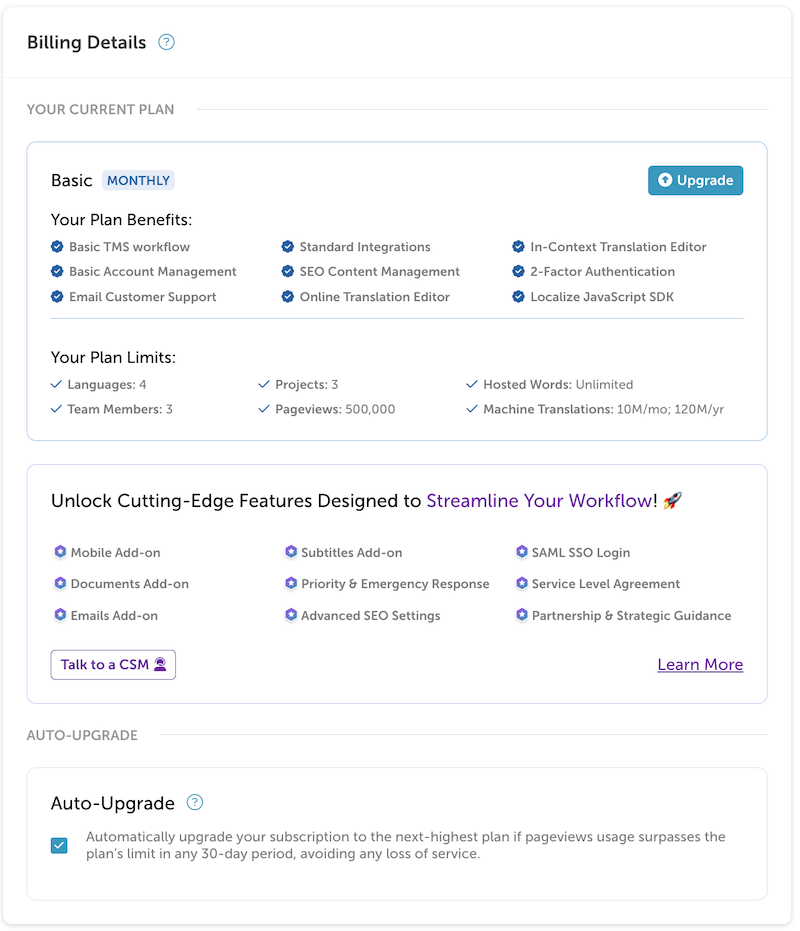
Your Current Plan
- This shows your subscription plan name and plan limits.
- Clicking the Upgrade button will allow you to upgrade or downgrade your account.
Your Plan Benefits
This panel lists the features available in your current plan.
Your Plan Limits
This table shows the amounts allowed for the following features in your current subscription plan:
- Languages: The max # of languages used in any one project
- Projects: The total # of projects
- Team Members: The total # of team members
- AI Translations:
- Monthly: Total # of characters of AI translations generated over the last 30 days
- Annual: Total # of characters of AI translations generated in your annual subscription period
- Pageviews: Total # of pageviews for your Organization across all Projects for the last 30 days
- Documents: Total # of documents allowed in your plan
- Emails: Total # of emails allowed in your plan
- Subtitles: Total # of subtitles allowed in your plan
Auto-Upgrade
- When auto-upgrade is enabled, your plan will upgrade to the next tier after you have surpassed your current pageview limit. Click here for details.
- Auto-Upgrade is enabled by default when you create a new Organization.
Invoices
When in the Organizations: Settings tab, click Invoices.
Here you can setup, view and print your invoices. Find out more...
Add [Update] Credit Card
- Here you can add/update your credit card information.
- Clicking on Add New Card or Edit Card will allow you to add or update your credit card.
API Keys
When in the Manage Organizations area: click API Keys
Here one can add, view, or edit API Keys for your Organization. API Keys are required if you use our REST API.
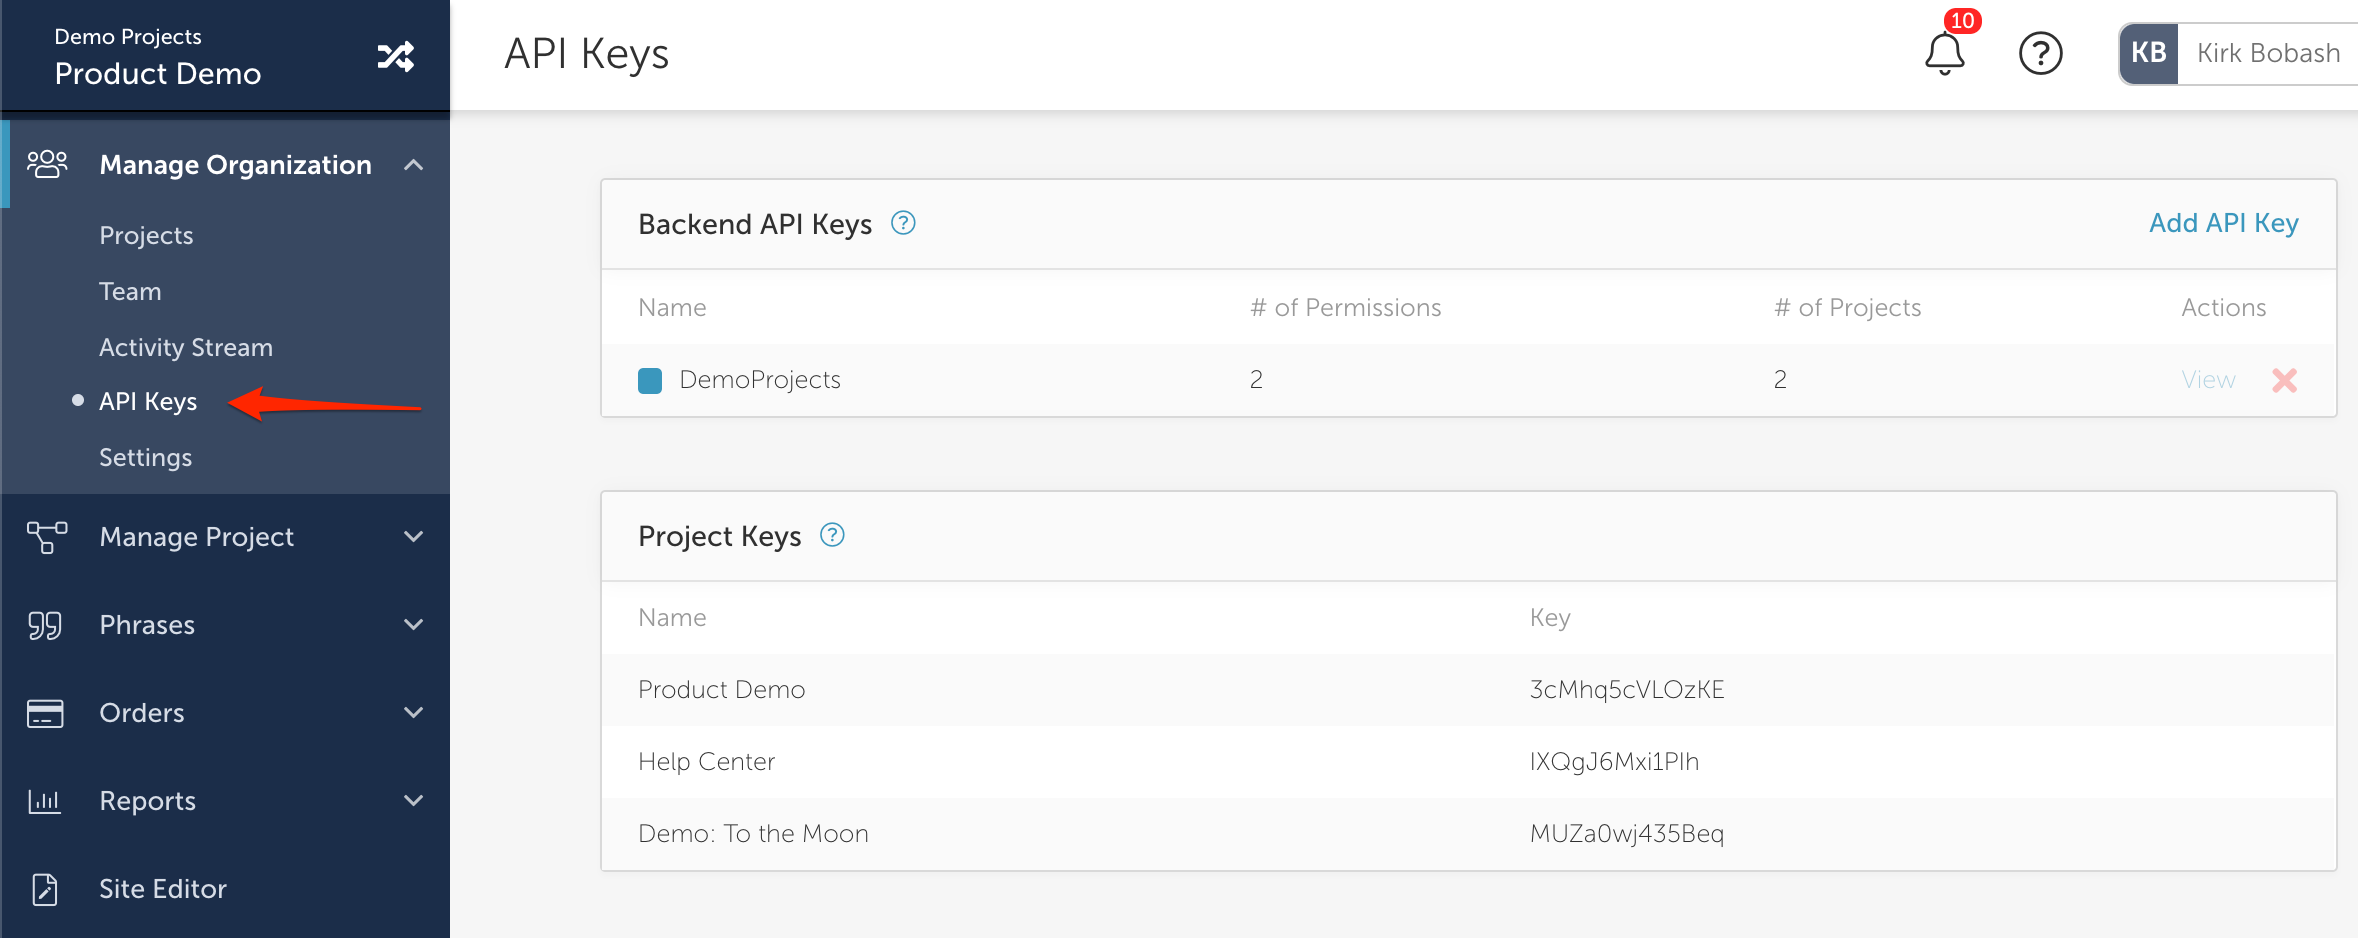
Add an API Key
Click the Add API Key link.
- Enter a descriptive name for your API Key.
- Select the projects that will use the key.
- Select only the required permissions that are required when using the key.
- Click Save API Key.
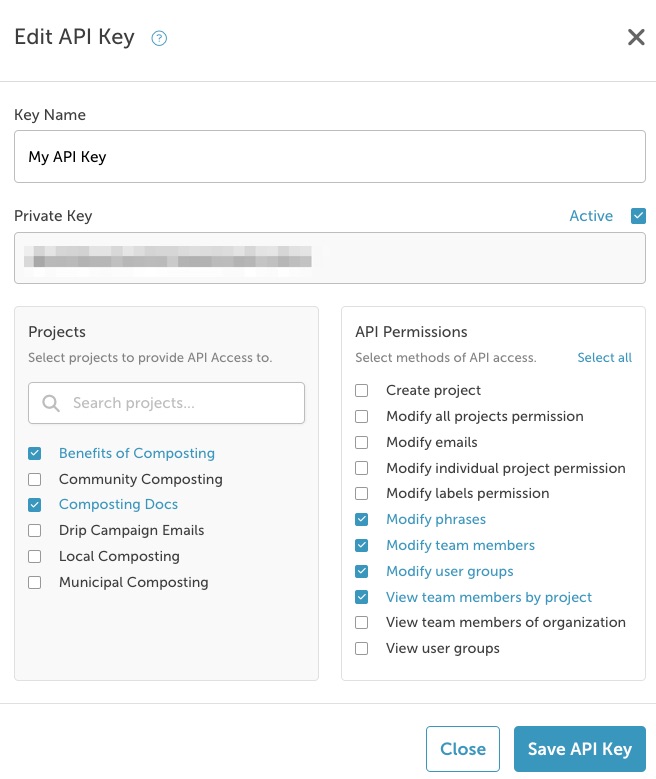
View/Edit an API Key
Click the ![]() edit button for an existing key.
edit button for an existing key.
You can then view/copy your API Key or edit the properties.
Project Keys
Here you can view the Name and Project Key for each of your Projects.

Multiple Organizations
You may also create multiple Organizations, when necessary. However, keep in mind that each Organization will have its own subscription plan with separate billing, teams, pageview limits, etc. One example where multiple Organizations might be useful is in a large company with multiple cost centers or departments who wish to manage their translations separately. Each Organization will have it's own billing and subscription Plan, with separate Projects and Teams.
Creating a New Organization
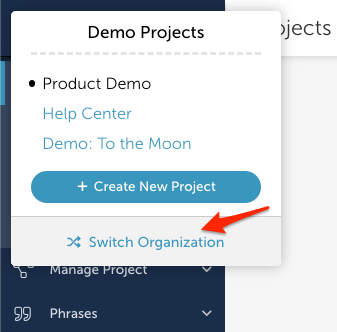
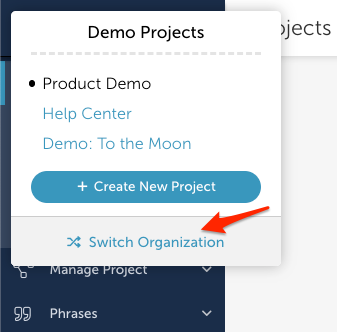
- Click on your Organization and Project name in the upper/left part of the screen.
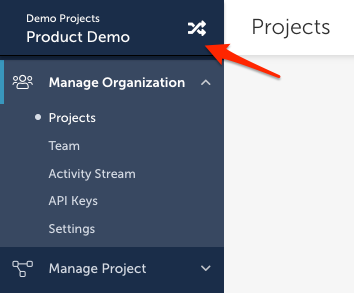
- Click on Switch Organization in the pop-up dialog.
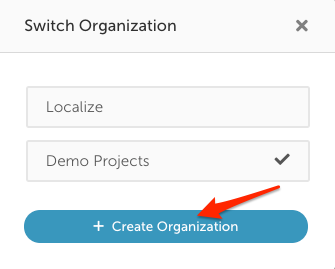
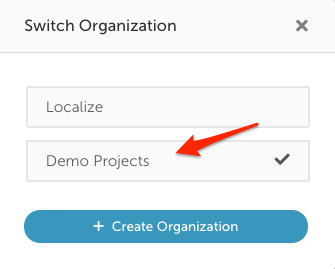
- Select Create Organization.
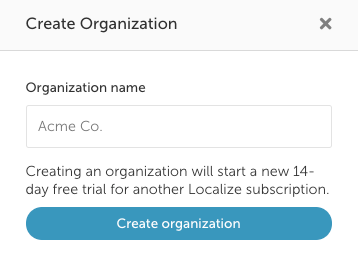
- Enter the organization name and select Create Organization.
Switching Organizations
- Click on your Organization and Project name in the upper/left part of the screen.
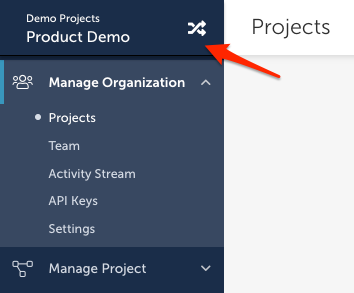
- Click on Switch Organization in the pop-up dialog.
- Click on the Organization name to switch to that organization.
Updated 4 months ago
